In this article
Key Takeaways
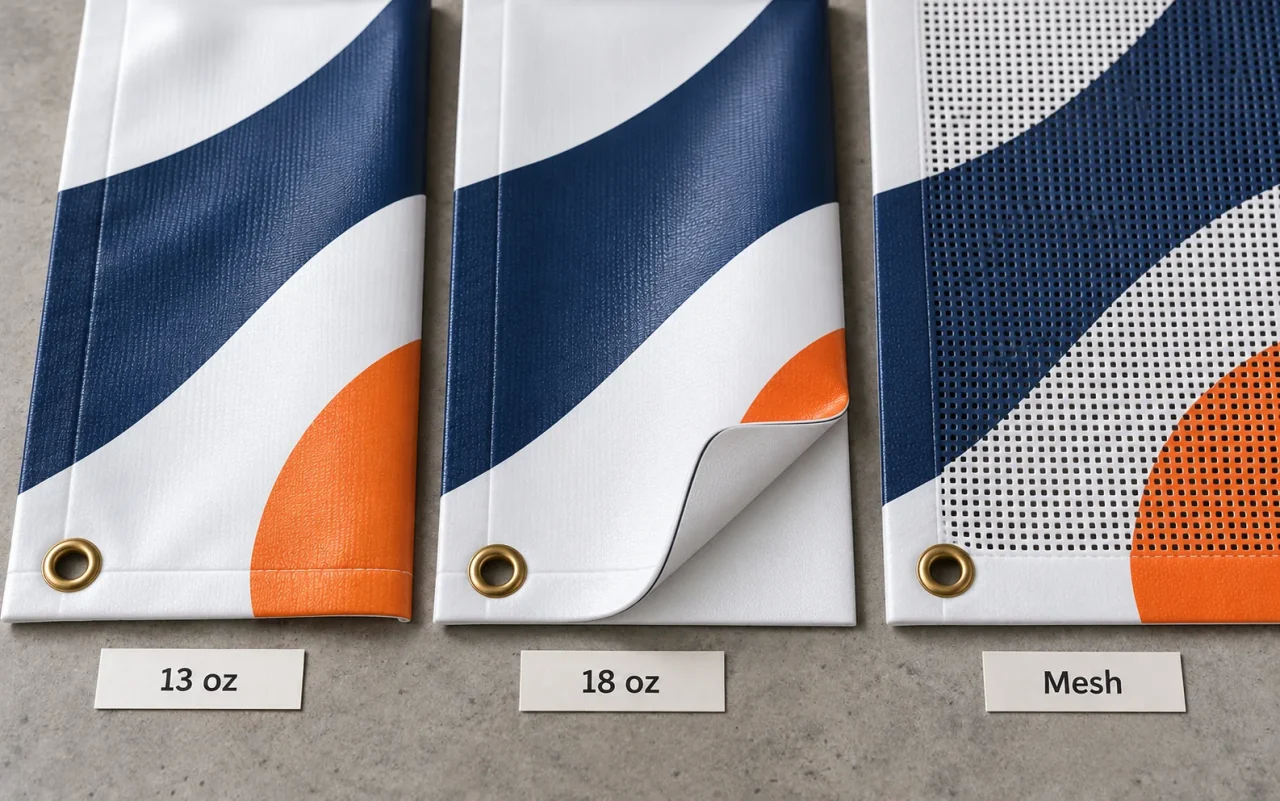
- Choose by site: 13 oz vinyl for indoor, wall-mounted and short-to-medium-term outdoor use; 18 oz blockout vinyl for opaque double-sided construction; mesh for exposed fences, scaffolding and large outdoor graphics where airflow matters.
- Mesh reduces wind load but does not eliminate it, and heavier vinyl alone does not make an exposed installation safe; specify the material’s open-area ratio and an appropriate supporting structure.
- Never cut unplanned wind slits into solid vinyl: the cuts create tear-starting points and do not turn an ordinary banner into a wind-rated system; ask for a suitable mesh construction and approved fixing arrangement instead.
- Use compatible elastic banner ties, distribute the load across all planned fixing points and do not over-tension the fabric; keep critical text, logos and QR codes at least 1.75 inches (4.4 cm) inside the outer trim edge.
The mesh vs. vinyl banner decision starts with your installation site. Solid vinyl offers continuous graphic coverage; mesh allows airflow through an open structure. Weight, print sides and finishing then help narrow the choice.
Quick Answer: Choose Your Banner Material
- Pick 13 oz Standard Vinyl for indoor backdrops, banners mounted against storefront walls and many short-to-medium-term outdoor promotions. Actual service life depends on the specified media, ink system, exposure, finishing and installation.
- Pick 18 oz Heavy-Duty Blockout Vinyl when the design requires an opaque, double-sided construction, such as a properly engineered pole-banner system. Extra weight alone does not make a banner safe for every exposed or high-wind installation.
- Pick Breathable Vinyl Mesh for exposed fences, scaffolding and large outdoor graphics where airflow is important. Specify the material’s open-area ratio and an appropriate supporting structure; mesh reduces wind resistance but does not eliminate wind loading.
1. The Truth About Wind Load: Why Banners Tear (And the “Wind Slit” Myth)
A solid vinyl banner hung across an open chain-link fence or between freestanding posts behaves like a sail. Wind force increases with the exposed area and approximately with the square of wind speed, so a gust can load the fabric, fixings and fence much more heavily than a light breeze. The actual force depends on the site and geometry; the banner size alone is not enough to establish a safe installation.
Avoid Cutting Unplanned “Wind Slits” Into Solid Vinyl: Half-circle cuts interrupt the material and can create tear-starting points. They do not turn an ordinary banner into a wind-rated system. For an exposed fence or windy corridor, ask for a suitable mesh construction and an approved fixing arrangement instead of cutting the finished graphic yourself.
2. Mesh vs. Vinyl Banner Materials: A Side-by-Side Comparison
| Feature | 13 oz Standard Scrim Vinyl | 18 oz Heavy-Duty Blockout | Breathable Mesh Vinyl |
|---|---|---|---|
| Weight / Construction | 13 oz/yd² is approximately 440 g/m²; the exact coating and scrim vary. | 18 oz/yd² is approximately 610 g/m²; specify an actual blockout construction. | Weight and open-area ratio vary by grade; 70/30 is one common construction. |
| Wind Passage | Solid material; an exposed installation can attract substantial wind load. | Also solid; heavier material does not make the supporting structure wind-proof. | Openings allow airflow, but open-area percentage is not a direct wind-force reduction rating. |
| Single / Double-Sided | Double-sided 13 oz is available; the standard frontlit configuration is single-sided. | A compatible opaque two-sided grade supports front and back graphics. | Common fence grades are single-sided; specialty two-sided products are construction-specific. |
| Graphic Appearance | A solid surface gives continuous print coverage. | The blockout layer reduces show-through between faces. | Open holes reduce continuous ink coverage; test fine text at the intended distance. |
| Typical Uses | Indoor events, wall-mounted promotions and suitable short-term outdoor jobs. | Double-sided pole or hanging systems with appropriate finishing and mounting. | Exposed fence graphics and larger outdoor applications with approved support. |
3. Pro Installation Tips for a Longer-Lasting Banner
- Choose Fixings for the Site: Compatible elastic banner ties can allow controlled movement and reduce abrupt loading at the grommets. Rigid ties, bungees and tension systems each have limits; use the type, spacing and working load recommended for the banner and supporting structure. Do not assume a bungee provides a fixed percentage of protection or doubles the banner’s life.
- Distribute the Load Across the Finished Edges: Our quoted banner finish specifies hems, grommets or pole pockets. With a grommeted banner, use the planned fixing points rather than suspending a long graphic from only four corners. Confirm spacing and edge reinforcement for the size and exposure, and avoid overtensioning the fabric.
- Remove Fold Creases Gently: Unroll the banner onto a clean, flat surface at normal room temperature and allow it to relax. Do not place a household iron against printed PVC. Ask us for the selected material’s care instructions before using heat; excessive temperature can distort the vinyl or damage the print, and some creases may remain.
4. Frequently Asked Questions
How close to the edge can I put text or phone numbers?
Keep all critical text, logos, and QR codes at least 1.75 inches (4.4 cm) inside the outer trim edge so they are never covered by our heat-welded hems or punched through by grommets.
Ready to choose a banner for your site? Configure your dimensions on our Custom Banners Page or review file setup rules in our Artwork Guidelines.