
In this article
Key Takeaways
- A backlit SEG lightbox offers even illumination and a clean, one-piece fabric face; a traditional pop-up display is the practical choice when a lower initial budget or simpler unit setup matters more.
- For an SEG lightbox, the light source, frame depth and print profile must work together for an even result; a large face may still need a seam depending on print width, and matte fabric reduces glare but cannot guarantee zero glare.
- Portable does not mean airline-checkable or exempt from convention material-handling charges: check the actual packed size and weight, airline allowance and your event’s hand-carry, labor and electrical rules.
- Install SEG fabric with the corner-and-center sequence: seat all four corners first, then the four center points, then work from centers toward corners, releasing and reseating bunched sections rather than pulling hard.
- Replacement fabric graphics are usually possible if compatible with your frame: order replacement graphics via a quote, and share the frame brand/profile, finished graphic dimensions, edge details and photographs; the outside frame measurement alone is not enough.
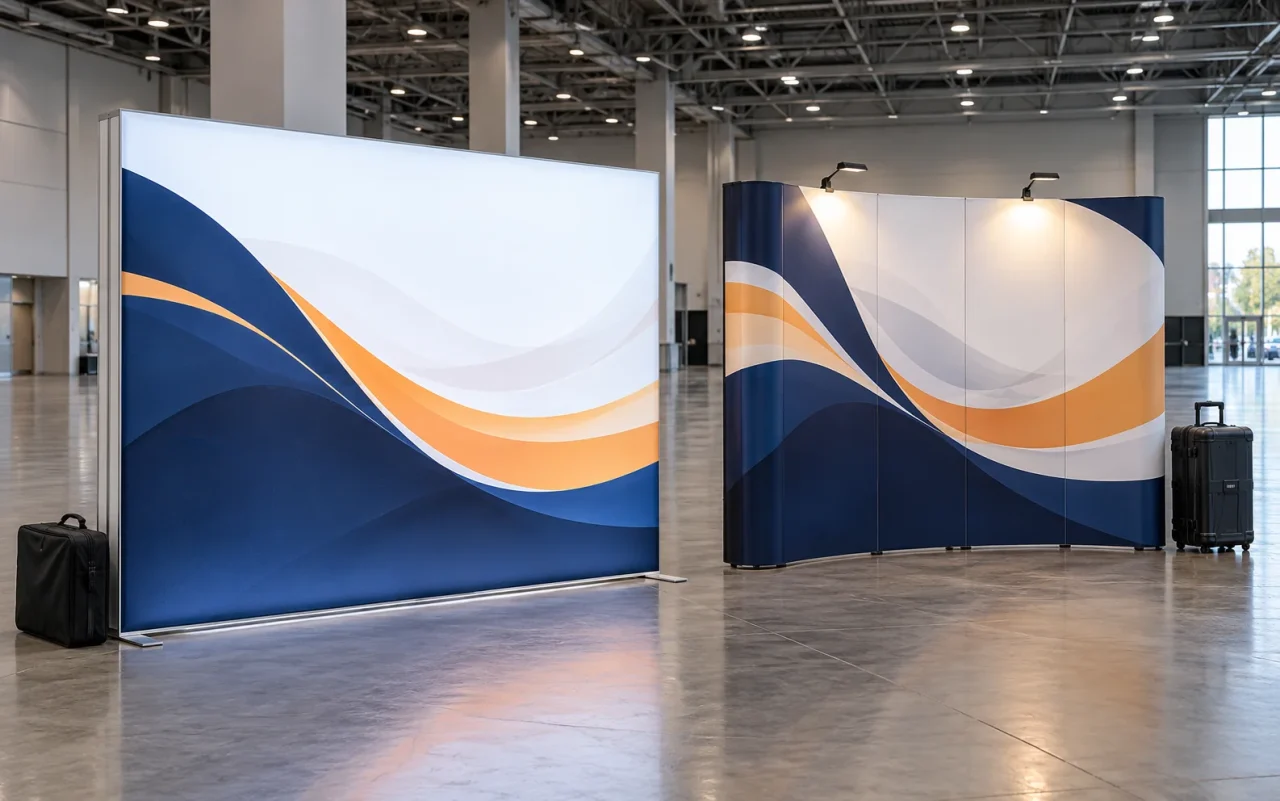
A SEG lightbox combines an illuminated frame with a silicone-edge fabric graphic. A pop-up display usually emphasizes a collapsible structure and portable setup. For your next show, compare the complete systems and how you will use them.
Quick Answer for Exhibitors
A Backlit SEG (Silicone Edge Graphic) Lightbox can make your graphics stand out with even illumination and a clean fabric face. A traditional pop-up display can be a practical choice when a lower initial budget or an unlit setup matters more. Compare the complete packed weight, assembly method, replacement-graphic cost and show-service requirements for the exact kits you are considering—not just the appearance of the backwall.
1. What Changes When You Choose a SEG Lightbox?
If you have exhibited with a magnetic-panel pop-up, you may know the trade-offs: protective cases take up space, panel joins can cross the artwork, and external lights need careful positioning. Those systems can still be useful for repeat events, especially when you already own the frame. A backlit SEG system offers a different approach to graphics, lighting and packing.
SEG Backlit Fabric Systems address those trade-offs in three ways:
Discover products
- Internal LED Illumination: LED bars or edge-lighting components sit inside the aluminum frame and illuminate a compatible backlit fabric. The light source, frame depth and print profile need to work together for an even result.
- A Clean Graphic Face: A one-piece fabric graphic can avoid the visible vertical panel joins of a magnetic pop-up. Whether a large face can be produced without a seam depends on the available print width and finished size. Matte fabric can reduce distracting reflections, but no display is guaranteed to have zero glare in every lighting condition.
- Plan Shipping and Material Handling Separately: Portable frames may pack into wheeled bags and reduce freight volume. That does not automatically make a complete kit airline-checkable or exempt from convention material-handling charges. Check the actual packed dimensions and weight, the airline allowance, and your event’s hand-carry, cart, labor and electrical rules. Freeman notes that services vary by show; use the exhibitor manual before estimating your costs.
2. Standard Booth Sizing Cheat Sheet (10×10 ft & 10×20 ft Spaces)
| Nominal Booth Space | Backwall Planning | Height and Clearance Check |
|---|---|---|
| 10 × 10 ft inline booth (3.05 × 3.05 m) | A 9.5–9.8 ft backwall is one possible starting point, subject to the actual allocated clear width and its feet. | Confirm the show’s permitted backwall height, pipe-and-drape, neighboring structures and all base projections. |
| 10 × 20 ft inline booth (3.05 × 6.10 m) | A purpose-sized backwall or compatible modular frames may work; account for connectors and feet in the full assembled width. | Confirm event-specific height, line-of-sight and structural rules. Two nominal 10 ft kits do not automatically fit a 20 ft space. |
3. The Cross-Corner Method for Smooth SEG Fabric Installation
A common installation mistake is to start at one corner and work all the way around, leaving excess fabric at the final edge. For a compatible SEG frame, follow its instructions and use a corner-and-center sequence to spread tension evenly:
- Seat All Four Corners First: Insert a short section of silicone edging at each corner, making sure the bead is oriented correctly for the frame. Avoid stretching one side tightly before the other corners are located.
- Seat the Four Center Points: Locate the middle of the top, bottom, left and right edges, then press those points into the channel.
- Work From the Centers Toward the Corners: Insert the remaining edging in balanced sections around the frame. If a section bunches, release and reseat it rather than pulling hard. Installation time and the removal of packing creases depend on the graphic size and fabric; follow the care instructions for any creases that remain.
4. Frequently Asked Questions
Can I order replacement fabric graphics later if I already have hardware?
Usually, if the graphic is compatible with your frame. Order replacement graphics via a quote: share the frame brand/profile, finished graphic dimensions, edge details and photographs. If you do not have a template, we will ask for the specific dimensions needed to confirm compatibility. Bead sizes, channel geometry, fabric stretch and sewing allowances vary, so the outside frame measurement alone is not enough to guarantee a fit.
Planning your next expo? Browse our portable kits on the Trade Show Displays Page or email hello@signcrisp.com for a custom booth bundle quote.