In this article
Key Takeaways
- True vector artwork (.AI, .EPS, .SVG, or a PDF with real vector paths) scales without pixelation; a file extension alone does not prove it is vector, so check the paths in a vector editor or Acrobat Object Inspector.
- Effective PPI equals image pixels divided by final printed width; aim for 100-150 PPI at full size, so a 48-inch-wide print needs about 4,800-7,200 px across, while artwork at 50% scale needs 200-300 PPI.
- Export files correctly: keep cutting paths as vectors, outline or convert text to curves, embed or package linked images, and check dimensions, resolution and color profile before sending.
- Low-resolution JPG or PNG files will print blurry; send the best file you have, because SignCrisp pre-press checks every file and can redraw simple text or logo vectors.
A vector file for printing helps keep logo shapes sharp as they scale from a small graphic to a large sign. Check that the logo contains real vector paths, and review the effective resolution of any photographs or other raster images placed alongside it.
Quick Answer: Screen Your File, Then Confirm the Objects
Renaming a JPG or PNG with a PDF extension does not convert it into vector artwork. Zooming in on a curved edge can reveal obvious pixelation, but a sharp appearance at 400%–800% does not prove that the file is vector: a high-resolution image can also look smooth at that magnification. A PDF may contain both vector objects and raster images. Confirm the logo’s paths in a vector editor, or use Acrobat Pro’s Object Inspector to inspect the objects and image resolution.
1. Why Use a Vector File for Printing Large Logos?
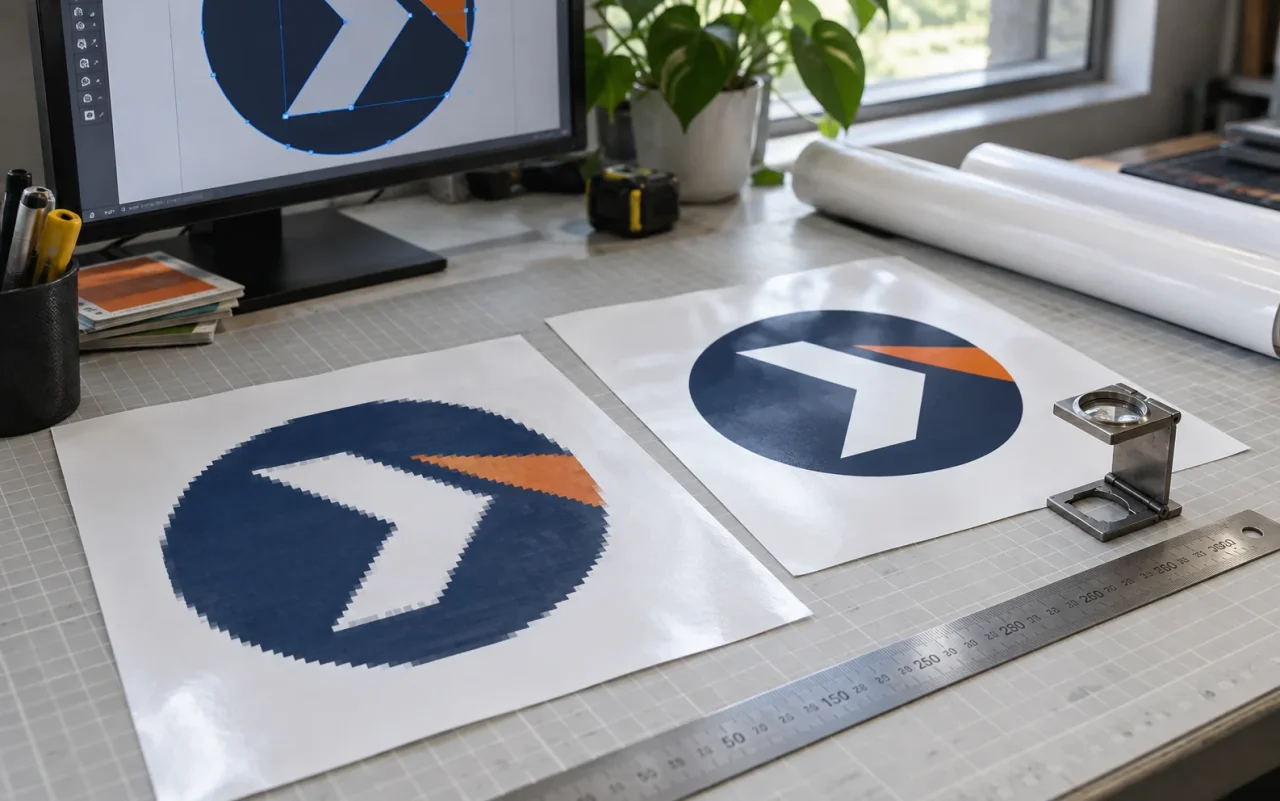
A small 600 × 600 pixel website logo can look sharp when displayed only a few inches wide on a screen. Stretch that same image to 48 inches across, however, and it contains just 12.5 pixels per inch at the final size. That low effective resolution can turn smooth letter edges into visible pixels. For source images, the precise term is PPI (pixels per inch); print instructions often use “DPI” as shorthand.
- True Vector Artwork (.AI, .EPS, .SVG or Vector Content in a .PDF): Built from mathematical coordinates and Bézier curves rather than a fixed grid of pixels. Proper vector paths scale without pixelation and are required for the cutting geometry of CNC- or laser-cut signs. An extension alone is not proof: these formats can also include placed raster images, and cutting paths still need a technical check.
- High-Resolution Raster Images (.TIFF, .PSD, .JPG or .PNG): Suitable for photographic backgrounds and many printed banners when their effective resolution at the final size meets the job specification. Our general starting range for large-format output is 100–150 PPI at 1:1 size; close-view work can need more, while viewing distance and the image itself also matter.
DPI for Large-Format Printing: Check the Actual Pixels
Effective PPI = image width in pixels ÷ final printed width in inches. A 4,800-pixel-wide photograph printed 48 inches wide provides 100 PPI. Print the same file at 24 inches wide and it provides 200 PPI. Changing a file’s stored DPI value alone does not create missing image detail.
Discover products
For our general large-format starting range of 100–150 PPI at full size, a 48-inch-wide raster image needs approximately 4,800–7,200 pixels across. Artwork built at 50% scale needs twice the resolution—200–300 PPI—to deliver the same effective resolution when enlarged. Check the final viewing distance and job specification; close-view photographs may need more. Vector logo paths do not have a fixed pixel resolution, but embedded photos still do.
2. Practical File Export Guide (For Illustrator & Canva Users)
| Software | Preparation Steps | Export and Final Check |
|---|---|---|
| Adobe Illustrator | Keep cutting paths as vectors. Use Type → Create Outlines for final text when required; keep an editable master. Embed or package linked images as requested. | Export the requested AI, EPS or print-ready PDF. Check paths, image resolution, dimensions and the agreed color profile. |
| CorelDRAW | Convert final text to curves using the program’s own command (commonly Ctrl + Q), and check all linked or embedded content. | Export the requested vector or print-ready PDF format. Reopen the result and check dimensions and objects. |
| Canva | Use the correct aspect ratio and high-quality source artwork. Keep important banner content inside the specified safe area. Exporting cannot restore detail missing from a screenshot. | Use PDF Print. CMYK selection and SVG export depend on your eligible plan; if unavailable, send the best export for pre-press review. Confirm actual objects and resolution after export. |
| Adobe Photoshop | For large-format photographic artwork, start with the specified final-size resolution, or scale it proportionally: 50% artwork at 200–300 PPI corresponds to 100–150 PPI at full size. Preserve an editable master. | Send the agreed TIFF, PDF or high-quality JPG and output profile. Flatten only the delivery copy if requested; a Photoshop PDF does not automatically turn raster pixels into vector paths. |
3. What If You Only Have a Low-Res JPG or PNG of Your Logo?
Don’t let a missing vector file delay your store opening. Upload the best file you have or email it to hello@signcrisp.com. Our pre-press engineers check every file manually before production: if your file will print blurry, we pause the order, alert you immediately, and can help redraw simple text/logo vectors so your final sign looks crisp.
Check our complete pre-press specs on the Artwork Guidelines Page.