In this article
A retractable banner (roll-up banner) looks effortless once standing: one tall graphic pulled smoothly from an aluminum base and supported by a rear pole. Yet part of the printed banner is never seen by your audience—the top edge is clamped inside a hanger rail, and several inches at the bottom remain wrapped around the tension roller inside the cassette.
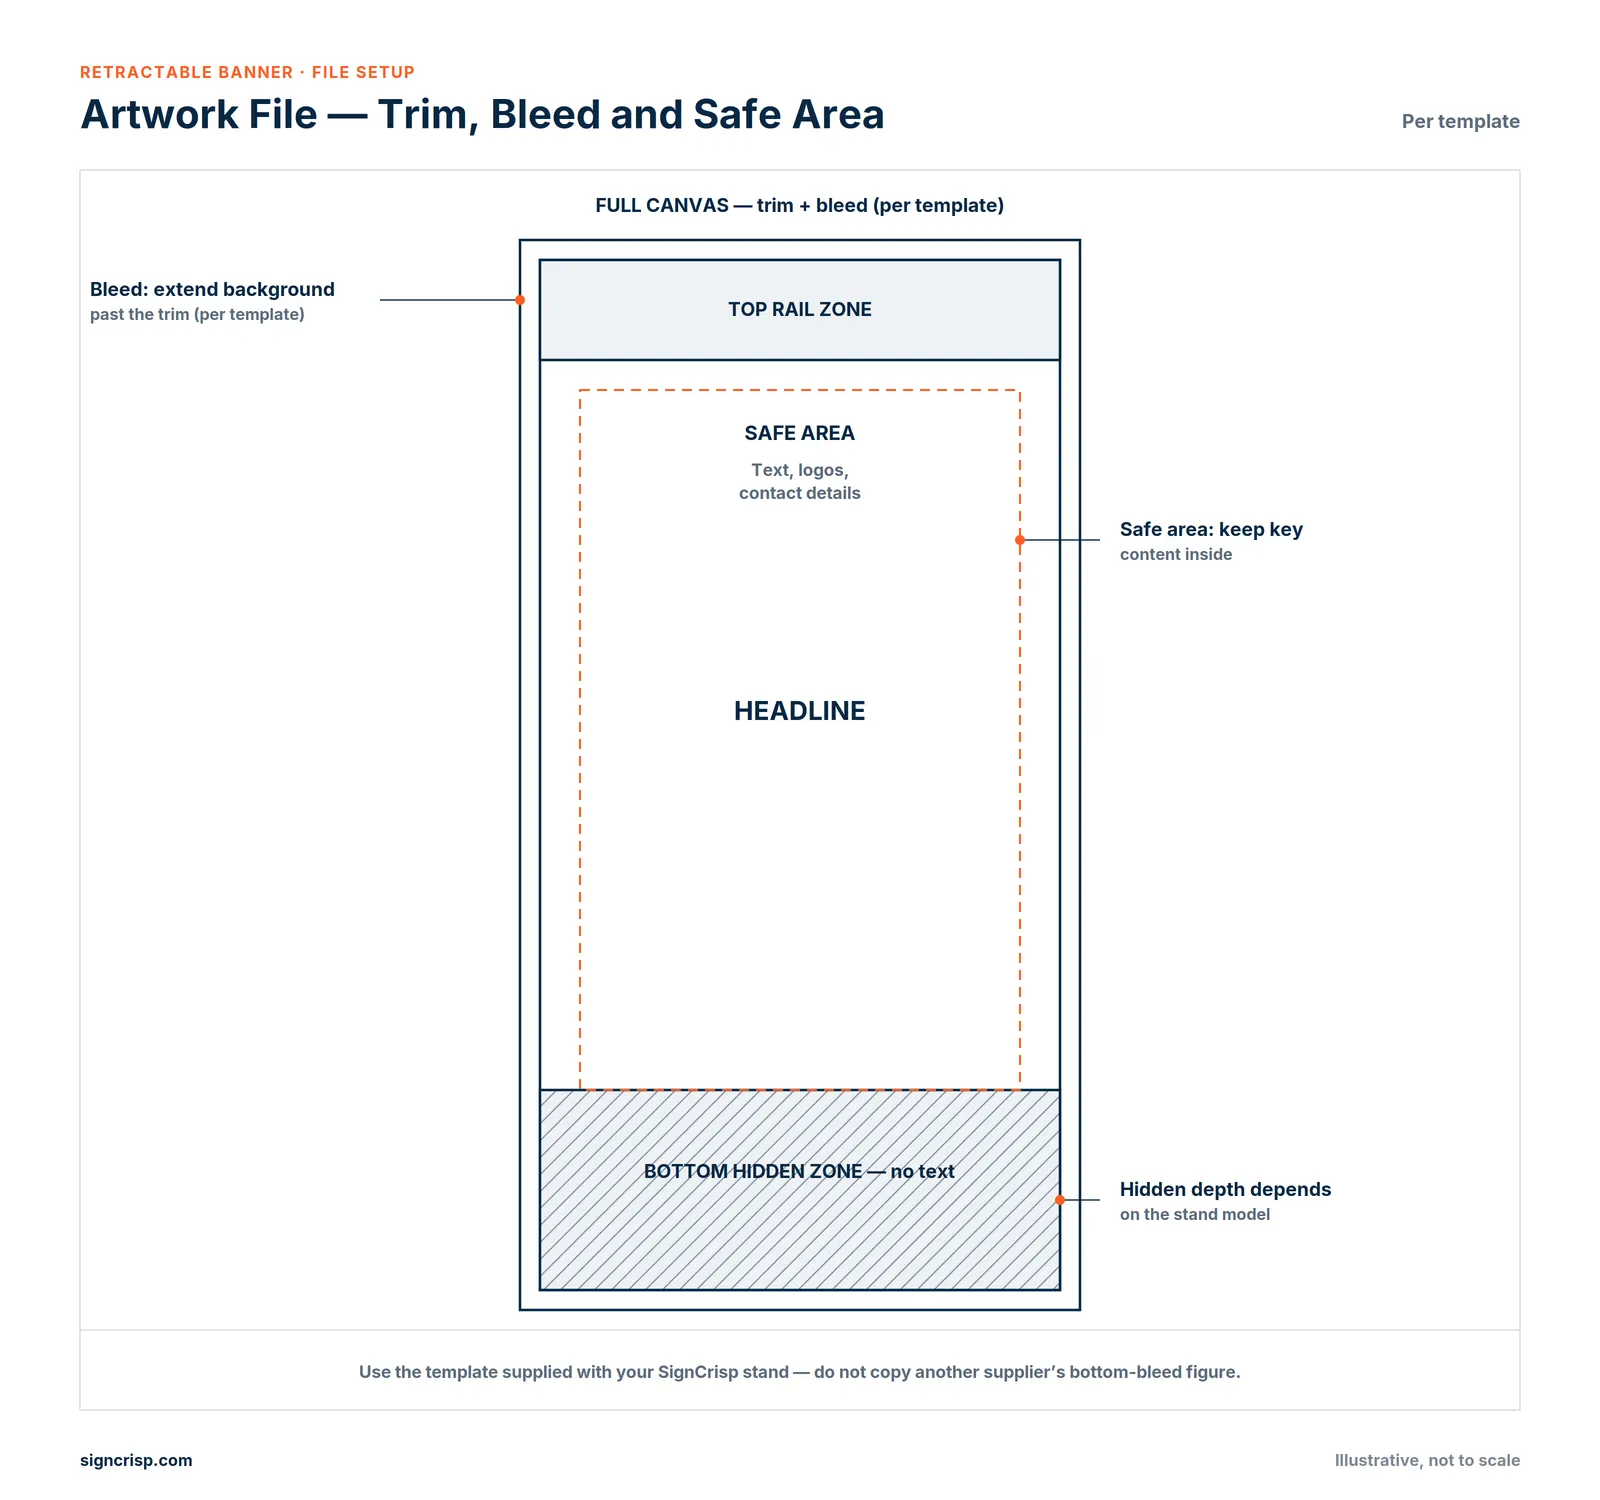
Retractable banner bleed is the extra printed background area that ensures color reaches every visible edge without white strips. The safe area is the inner margin where all headlines, logos, and QR codes must stay, while the visible area is the exposed graphic height once pulled up.
1. Bleed, safe area and visible area — three terms
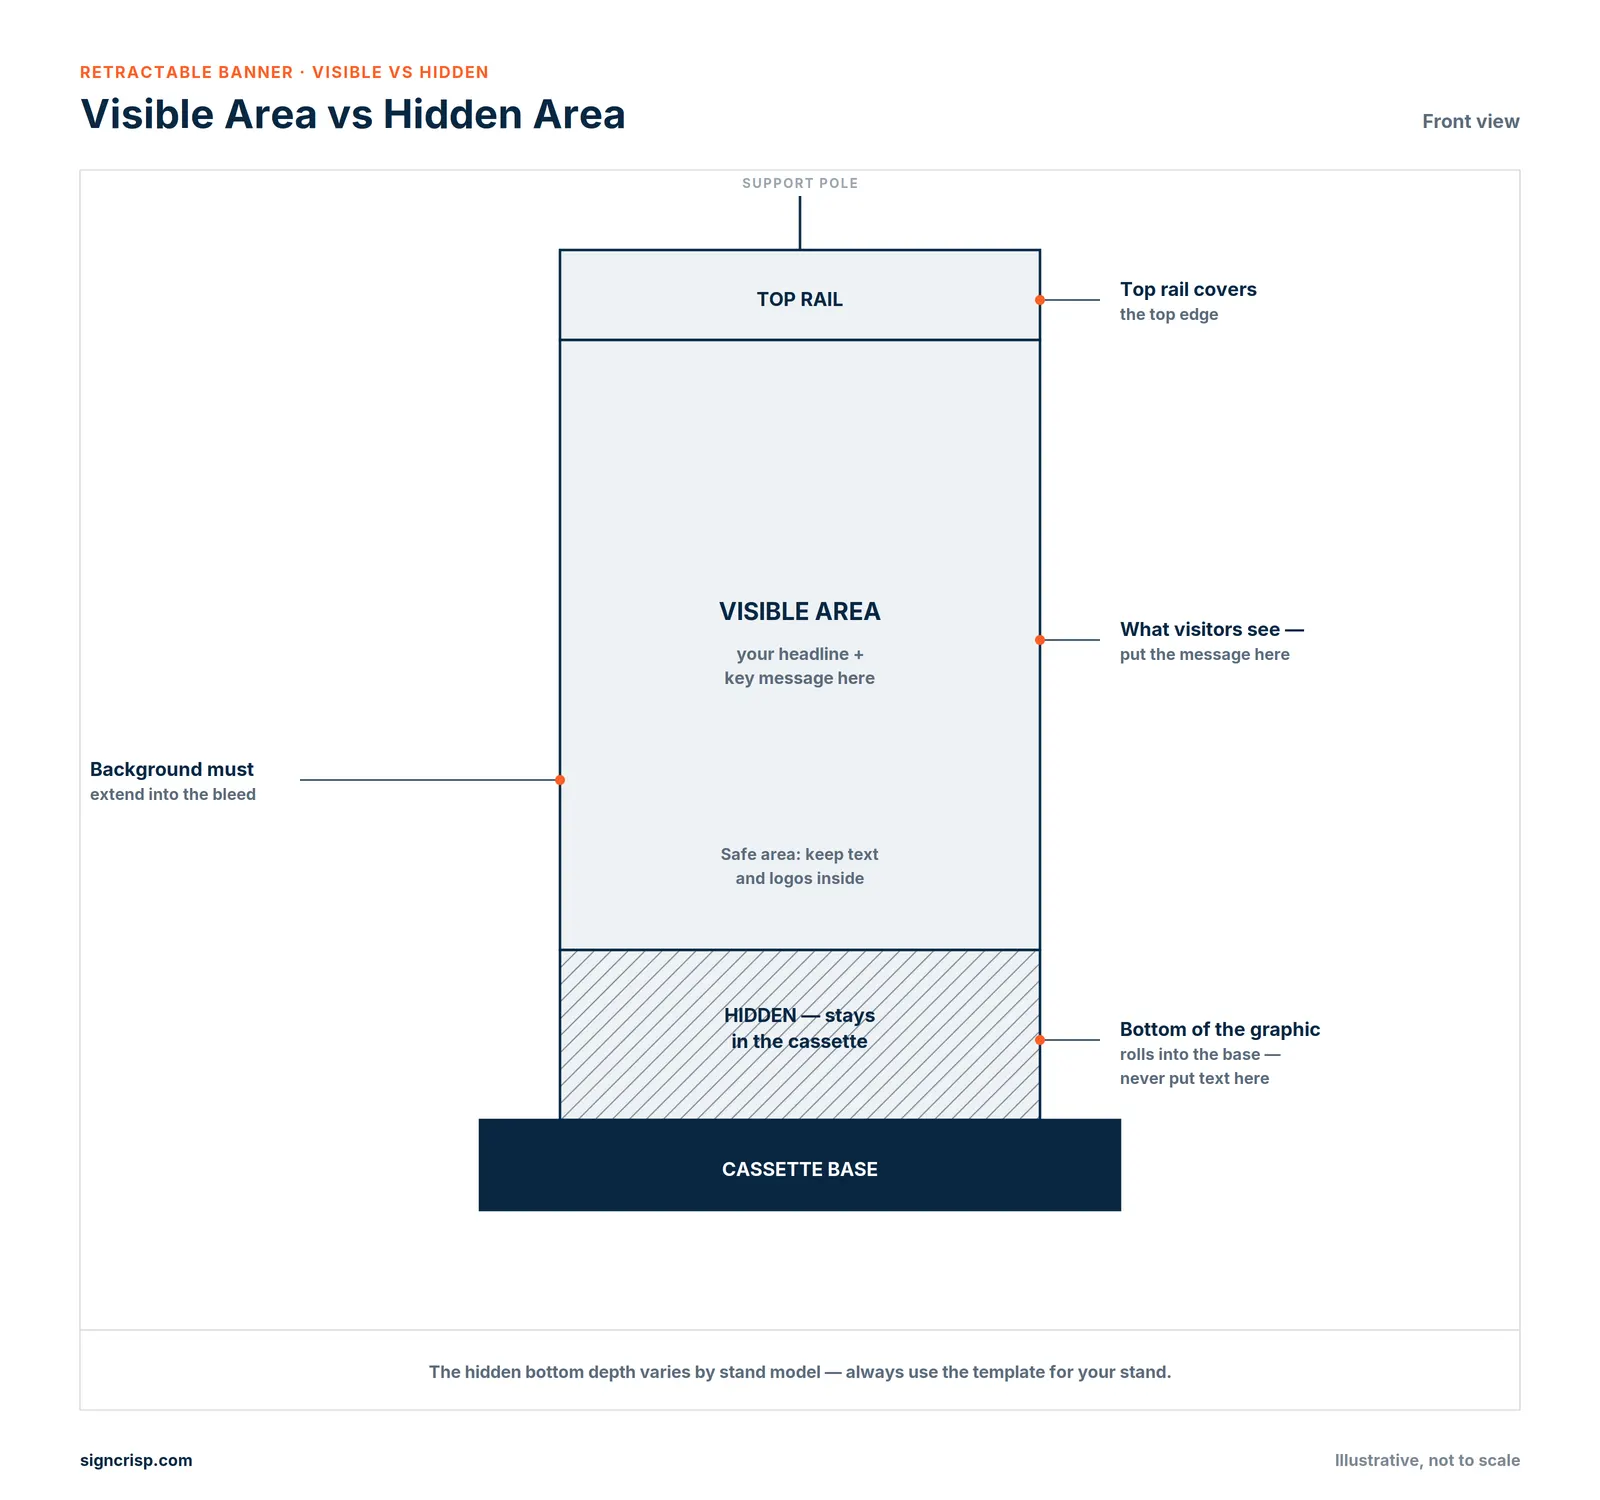
- Bleed: The perimeter margin outside the finished trim lines, plus the hidden bottom leader that stays inside the base. Extending background colors and photography through the bleed guarantees no unprinted white edge appears at the top bar or base opening.
- Safe area: The protected interior zone for text, logos, contact details, and QR codes. It is inset from the left and right edges, and inset further at the top and bottom where the clamping rail and cassette entry cover the print.
- Visible area: The actual display dimensions seen when the banner is erected. The total printed graphic height is always taller than the visible height because of the top rail grip and bottom roller wrap.
2. Why the bottom bleed number changes by stand
Unlike a flat foam-board sign that trims cleanly on all four sides, a retractable banner relies on a spring-loaded roller inside the aluminum cassette. A extra strip of graphic—often called the bottom leader or bottom bleed—must stay wrapped inside the base to hold tension.
Because cassette depth, roller diameter, and attachment method (snap-leader vs. adhesive leader strip) vary across stand manufacturers, bottom bleed numbers vary across the printing industry:
| Supplier / Stand Type | Published Bottom Allowance / Bleed |
|---|---|
| SignCrisp Retractable Stands | 3 to 6 inches at the bottom (varies by standard vs. deluxe wide-base cassette model; confirmed on your exact stand template) |
| GotPrint | Lists 6 inches at the bottom for its stands |
| ExcelPrintMail | Templates show 6 inches of bottom bleed |
| Standard OEM Cassette Listing | Typically 4 inches non-visible total (1 in top bar + 3 in inside base) |
| EGPrintPro | Uses 0.25 inches perimeter bleed (with leader handled separately) |
None of these figures is wrong for its own hardware—each reflects how that specific cassette holds tension. Because SignCrisp manufactures multiple retractable stand models (from compact standard cassettes to heavy-duty wide-base stands), bottom bleed allowance typically ranges from 3 to 6 inches depending on the base mechanism. Always request the official SignCrisp template matched to your exact stand model and verify the crop lines on your digital proof.
3. Setting up your file: the six steps
Follow this six-step workflow when preparing roll-up banner artwork for a SignCrisp order:
- Download the template for your exact stand model. Do not guess dimensions or reuse a template from another printer. Request the matching template from SignCrisp and check the specs on our Retractable Banner Stands page.
- Set your artboard to full canvas size (visible height + top/bottom allowance + bleed). Always build your file to the full template height, not just the visible height.
- Extend backgrounds continuously through the bottom hidden zone. Pull solid colors, gradients, and background photos all the way to the bottom edge of the template so no white line peeks out above the cassette slot.
- Keep headlines, logos, and QR codes inside the safe area. Place your primary headline and brand logo in the upper third of the visible area (eye level), and keep website URLs or booth numbers well above the bottom safe-area guide.
- Check the top rail and bottom cassette zones separately. They are asymmetrical: the top clamp typically covers 0.5 to 1 inch, whereas the bottom cassette hides 3 to 6 inches.
- Export a print-ready PDF and inspect your digital proof. Export a print-ready PDF at full template size in CMYK color mode at 150 DPI (at 100% scale), with all fonts converted to vector outlines (
Create Outlines) and high-resolution images embedded. When your SignCrisp digital proof arrives, inspect it at 100% zoom—paying close attention to the top rail and bottom cassette crop lines.
For detailed vector and color-matching rules, see our Artwork & File Prep Guidelines.
Discover products
 Custom Vinyl BannersCustomize
 Custom Feather FlagsCustomize
 Custom Rectangle Flag with Pole & Water Base – 23.6" × 63"Customize
 Custom Retractable Banner Stand – Silver Aluminum Roll-UpCustomize
4. Common sizes: what the numbers mean
While width and height are governed by your specific stand hardware, commercial retractable banners typically follow standardized visible widths—most commonly 33.5″ × 79″ (85 × 200 cm), alongside 31.5″ (80 cm), 36″ (90 cm), and 47″ (120 cm) wide-format stands.
In every model, the total printed graphic height is taller than the visible display height because the bottom leader remains rolled inside the cassette. Confirm the exact visible dimensions and total canvas height on your SignCrisp stand template and pre-production proof before finalizing your layout.
5. Five mistakes that waste a print run
| Mistake | What happens | Fix |
|---|---|---|
| Placing contact info or QR codes near the bottom edge | Text disappears inside the aluminum base cassette | Keep all text and QR codes above the bottom safe-area guide |
| Stopping the background image at the visible trim line | A white strip shows at the base when tension shifts slightly | Extend background color and imagery through the full bottom bleed |
| Using another supplier’s 6-inch template blindly | Canvas height mismatches your stand’s actual roller wrap | Build strictly on the SignCrisp template for your stand model |
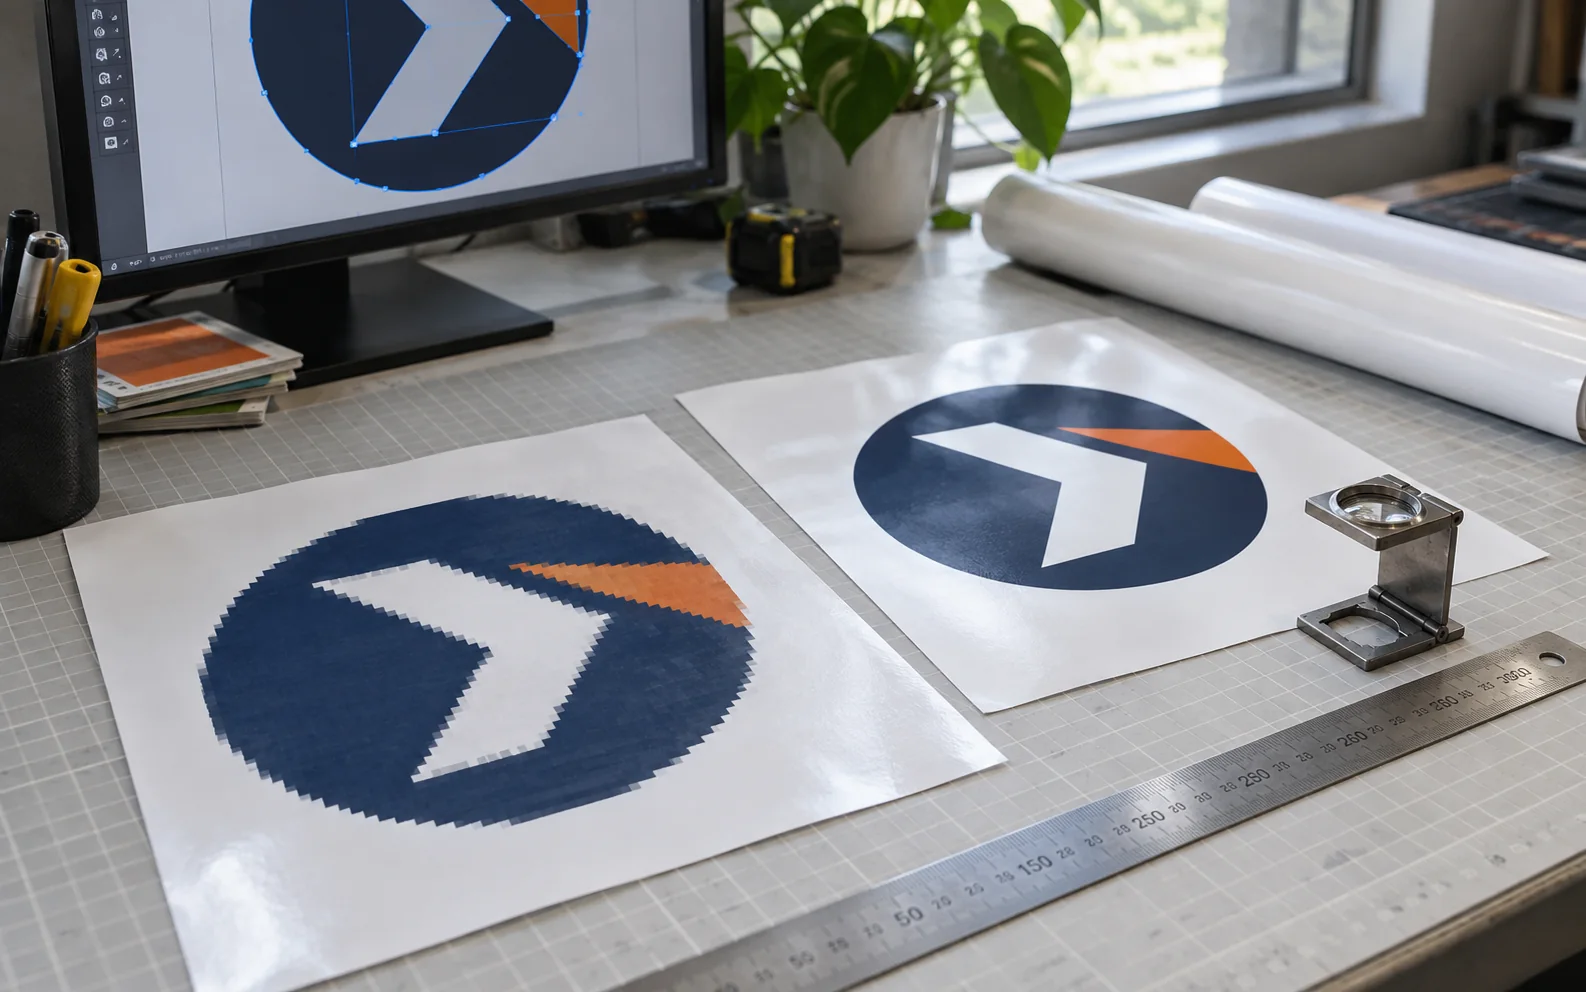
| Scaling up a low-resolution web logo | Brand logo prints soft or pixelated at eye level | Use vector artwork (.AI, .EPS, .PDF) with outlined fonts |
| Approving the proof without checking top/bottom guides | Clamping bar cuts into the top of a headline | Zoom to 100% on the top and bottom safety lines before approving |
If you are unsure whether your layout clears the cassette zone, our prepress engineers review inquiries within 12 hours. Standard production takes 4–7 business days, with DDP door-to-door delivery in 7–12 business days.
6. Replacement graphics for an existing stand
Ordering a replacement graphic only is different from ordering a complete retractable banner stand package (which includes the pre-installed print, aluminum cassette, support pole, and padded carry bag). Because cassette widths, top-bar clips, and internal leader attachments vary across models, confirm your exact stand model and width before ordering a replacement print—or send SignCrisp a quick photo of your stand base with a tape measure across the width.
7. FAQ
How much bleed does a retractable banner need? It depends on the stand hardware. While side and top bleed typically require 0.25 to 1 inch, the bottom non-visible allowance usually ranges from 3 to 6 inches (for example, 3–6 inches across SignCrisp stand models, 6 inches at GotPrint, or 4 inches total non-visible on certain OEM cassettes). Always use the exact template for your stand model.
Why is the bottom hidden area larger than the top? Because the bottom of the graphic wraps around the spring-loaded tension roller inside the base cassette. Printing your background continuously through that bottom section ensures no unprinted white strip shows above the base slot.
Where should my headline go? Place your main headline and logo inside the safe area within the upper third of the visible graphic—at natural eye level—well clear of the top clamping rail and far above the bottom cassette zone.
Can I reuse artwork made for another supplier? Yes, once you adjust the artboard to match the SignCrisp template for your stand model. Because different stands hide different amounts of graphic at the base, resizing the background bleed and verifying safe-area guides takes just a few minutes and prevents cut-off text.
8. Request the template for your stand
Retractable banner bleed is simple once you build on the right template: extend the background, protect the safe zone, and keep key messages at eye level.
Explore our Retractable Banner Stands and Trade Show Displays, or request the official artwork template and free digital proof for your model by emailing hello@signcrisp.com, messaging WhatsApp +852 6995 1502, or visiting our Contact page.
{ “@context”: “https://schema.org”, “@type”: “FAQPage”, “mainEntity”: [ { “@type”: “Question”, “name”: “How much bleed does a retractable banner need?”, “acceptedAnswer”: { “@type”: “Answer”, “text”: “Retractable banner bleed depends on the stand hardware. While side and top bleed typically require 0.25 to 1 inch, the bottom non-visible bleed area ranges from 3 to 6 inches so the graphic can wrap around the internal tension roller inside the cassette. Always build your file using the exact template for your stand model.” } }, { “@type”: “Question”, “name”: “Why is the bottom hidden area larger than the top?”, “acceptedAnswer”: { “@type”: “Answer”, “text”: “The bottom hidden section stays rolled inside the aluminum base cassette to anchor the graphic and maintain spring tension. Extending your background artwork through this bottom allowance prevents an unprinted white strip from showing at the base of the stand.” } }, { “@type”: “Question”, “name”: “Where should my headline go on a retractable banner?”, “acceptedAnswer”: { “@type”: “Answer”, “text”: “Place your primary headline and logo inside the safe area within the upper third of the visible graphic—at eye level—well clear of the top clamping rail and far above the bottom cassette zone.” } }, { “@type”: “Question”, “name”: “Can I reuse artwork made for another supplier’s retractable banner stand?”, “acceptedAnswer”: { “@type”: “Answer”, “text”: “Only if you resize and adjust the file to match the SignCrisp template for your specific stand model. Different stands have different visible heights and bottom tension allowances, so reusing a file without adjusting the canvas can leave key text hidden inside the base.” } } ] }
Still choosing hardware? Read our X-banner stand vs. retractable banner stand comparison.